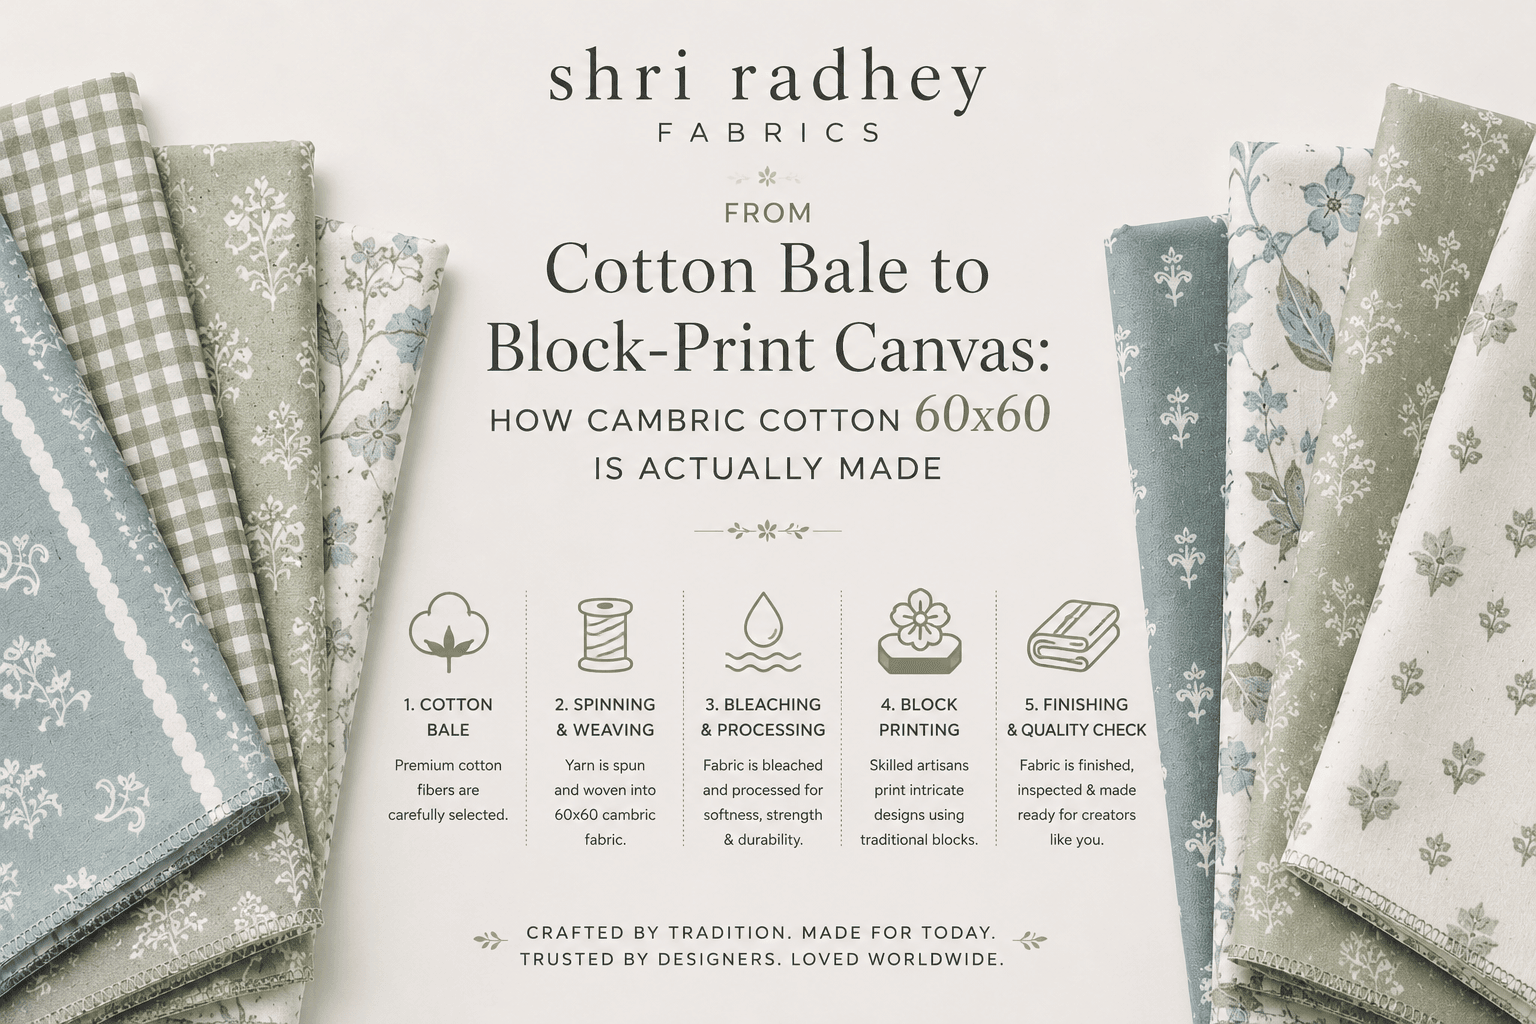
Most people who wear a block-printed cotton kurta have never thought about what it took to create the fabric underneath the print. They see the finished result — a crisp, smooth, beautifully printed cloth — and they hold it, wear it, wash it, and enjoy it without knowing the ten-step manufacturing journey that happened before a single drop of dye touched the surface.
That is completely understandable. Most of us drink coffee without thinking about the journey from coffee plant to cup. We drive cars without understanding combustion engines. The end product is what matters in daily life.
But for fabric buyers, fashion brand owners, garment manufacturers, and anyone making commercial decisions about textile sourcing — understanding how cambric cotton 60×60 is made is not academic curiosity. It is the foundation of knowing what you are paying for, what quality questions to ask, where in the process shortcuts get taken, and why the fabric that comes out of one spinning mill or weaving unit is noticeably different from the same specification out of another.
This is the complete guide to how cambric cotton 60×60 goes from a raw cotton bale to the smooth, bright, precisely woven fabric that forms the canvas for Jaipur’s finest block prints. Written from our manufacturing perspective in Sanganer, this is the journey as it actually happens — not as a textbook describes it.
Before the Factory Begins: The Cotton That Makes 60×60 Possible
Not every cotton fibre can become 60-count yarn. This is the first thing to understand — and it is a point that affects quality from the very beginning of the supply chain, long before the fabric is woven.
In the Ne (English Number) yarn count system used across India’s textile industry, 60-count yarn (written 60s or Ne 60) means the yarn is fine enough that 60 lengths of 840 yards each can be spun from a single pound of cotton fibre. The higher the count, the finer and longer the fibre needs to be to spin that yarn without excessive breakage.
Short-staple cotton — fibre with an average length below 22mm — cannot reliably spin to 60-count. The short fibres do not hold together under the tension of fine spinning. They break, create irregularity, and produce yarn that is uneven and weak at fine counts.
To spin 60s yarn consistently, the cotton needs to be medium-to-long-staple, typically 28–32mm staple length. In India, this quality comes primarily from:
- Shankar-6 cotton from Gujarat and Maharashtra — one of India’s most widely produced medium-long-staple varieties, with a staple length around 29–31mm and a micronaire (fibre fineness measure) of 3.5–4.5, ideal for 60-count spinning.
- MCU-5 and DCH-32 varieties from Tamil Nadu and Karnataka — extra-long-staple varieties used for the finest Indian cambric.
- Rajasthan’s cotton crop — grown in Ganganagar, Hanumangarh, and surrounding districts, contributing meaningfully to the cotton supply that reaches Jaipur’s fabric industry.
India is the world’s largest producer of cotton, and the variety and quality of cotton available to Indian manufacturers is genuinely extraordinary. The challenge for a 60×60 cambric manufacturer is consistency — sourcing cotton of the right staple length and fineness, bale after bale, to keep yarn count and quality stable across production runs.
This is why two rolls of “60×60 cambric” from different manufacturers can feel noticeably different. The specification is the same. The cotton quality is not.
Stage 1: Ginning and Bale Opening — Separating Fibre From Everything Else
Cotton arrives at a spinning mill as a compressed bale — a dense block of raw fibre that contains not just cotton but seeds, leaf fragments, dust, dirt, small stones, and organic debris from the harvesting process. Before any yarn can be spun, this raw material needs to be cleaned down to pure fibre.
Ginning — usually done at the cotton farm or a local gin facility before the cotton reaches the spinning mill — separates the cotton fibre (lint) from the seed. Modern gin saws can process hundreds of kilograms of raw cotton per hour, pulling the fibre away from the seed while minimising fibre damage.
The ginned cotton arrives at the spinning mill as loose, compressed bales. The first machine it meets is the bale opener — a series of spiked rollers that break open the compressed bale and begin loosening the tangled fibre mass into something that can flow through the spinning process.
From the bale opener, the cotton moves through a cleaning and blending system — a series of machines that beat, shake, and air-transport the fibre while mechanical screens and air currents remove heavy impurities (stones, seed fragments) and light impurities (dust, leaf bits). For fine 60-count spinning, cleaning efficiency at this stage is critical. Any remaining hard impurities will damage the delicate fine-count yarn downstream or cause visible defects in the finished fabric.
Stage 2: Carding — When Cotton Fibre Becomes a Continuous Web
After opening and cleaning, the loose cotton fibre enters the carding machine — one of the most important pieces of equipment in the entire yarn manufacturing process.
A carding machine has a large rotating cylinder covered in fine wire clothing (tiny hook-shaped teeth), surrounded by smaller revolving rollers also covered in wire. As the cotton fibre passes through, the wire clothing combs through it, separating tangled clumps into individual fibres, aligning them roughly in the same direction, and removing the remaining short fibres and impurities that opening and cleaning left behind.
The output of carding is a thin, continuous, soft rope of loosely assembled fibres called a sliver. Think of it like a very thick, extremely fragile cotton rope with no twist to hold it together. At this stage the fibres are partially aligned but not yet in the tight, parallel order that fine-count yarn requires.
For 60×60 cambric production, carding quality directly affects the final fabric’s surface character. Poorly carded sliver contains more fibre entanglement and short fibre content, which shows up in the yarn — and subsequently in the fabric — as slight unevenness in surface texture. The smooth, consistent surface of quality 60×60 cambric starts here.
Stage 3: Combing — The Step That Separates 60×60 From Ordinary Cotton
This is the stage that most people have never heard of but that makes the most significant difference in fine-count yarn quality — and it is the reason why experienced buyers always ask: “Is this combed or carded yarn?”
After carding, the sliver goes through a combing machine. Combing is an additional, optional processing step that carded yarn does not receive. It involves passing the carded sliver through a very fine comb that does two things simultaneously:
First, it removes short fibres — fibres shorter than a set threshold (typically below 12–15mm) are combed out and discarded. These short fibres are called “noil.” For 60-count yarn, removing short fibres is essential — they are the primary cause of surface hairiness in fine-count yarn and they create weak points in the yarn that cause breakage during weaving.
Second, combing further aligns the remaining long fibres in near-perfect parallel, creating what is called a combed sliver — a rope of fibre where almost every individual fibre runs in the same direction, parallel to its neighbours, like a well-organised bundle of drinking straws.
The difference between combed and carded 60s yarn is visible and tactile in the finished fabric. Carded 60s has more surface hairiness, slightly less regularity, and a softer but somewhat rougher character. Combed 60s is noticeably smoother, more lustrous, more even, and produces fabric with the quiet sheen that quality cambric is known for.
At Shri Radhey Fabrics, when we specify the cambric cotton 60×60 we supply to fashion brand clients, we always specify combed yarn. The price difference is real — combing removes approximately 15–18% of the fibre as noil waste, which raises the yarn cost — but the surface quality difference in the finished cambric is equally real. Buyers who accept carded-only 60s yarn to save cost are paying less for a fabric that feels and prints differently.
Stage 4: Drawing — Making the Sliver Even
After combing, multiple slivers are fed together through a drawing frame — a machine that does two things in one pass. It doubles several slivers together (typically six to eight at once) and then draws them out (attenuates them) by passing them between rollers moving at progressively higher speeds. The doubling evens out thickness variations between individual slivers — thick spots in one are cancelled out by thin spots from the others when they combine.
The drawing frame may be passed through two or three times (called breaker and finisher draw frames) to progressively improve the sliver’s evenness and fibre parallelism. The output is a drawn sliver — thinner, more even, and with fibres in tight parallel alignment.
Evenness at this stage has a direct and measurable effect on the finished fabric’s GSM consistency. An uneven sliver produces uneven yarn, which produces a fabric with variations in weight and density across its width. For block-print applications, this shows up as inconsistent dye absorption — certain areas print slightly darker or lighter than others. For 60×60 cambric used as block-print base, drawing frame quality control is part of what separates premium-grade fabric from standard-grade.
Stage 5: Roving — One Step Before the Final Yarn
The drawn sliver is still far too thick to be wound onto a spinning bobbin. It needs one more intermediate step: the roving frame.
The roving frame takes the drawn sliver and attenuates it further — drafting it out to a thinner, more manageable thickness — while adding a small amount of twist. This twist is just enough to hold the attenuated fibre bundle together for transport and handling without causing it to break. The output is called roving — a soft, slightly twisted intermediate product wound onto large bobbins.
Roving is the feedstock that goes directly into the ring spinning frame. The amount of twist in the roving must be carefully calibrated: too little twist and the roving will break during transport; too much twist and it resists the ring frame’s drafting rollers, causing irregularity in the final yarn.
Stage 6: Ring Spinning — Where the Yarn Is Actually Born
This is the heart of the spinning process. The ring spinning frame is where roving becomes yarn.
Ring spinning — still the dominant method for fine-count cotton yarn in India and globally — works by drafting the roving out to the final yarn thickness and simultaneously inserting twist to bind the fibres together into a strong, coherent thread.
The roving bobbin sits above the machine. The roving passes through a series of drafting rollers that progressively stretch it out to the final fineness — for 60-count yarn, this means a very high draft ratio, because the roving needs to be drawn out significantly. The attenuated fibre bundle then passes through a traveller on a ring, which spins around the bobbin at high speed, inserting twist as the yarn winds onto the bobbin.
For 60s yarn, the draft ratio is high and the traveller speed is significant — both of which demand precise machine setting and good quality roving. Any irregularity in the roving (thick or thin spots from earlier processing) will amplify in ring spinning, appearing as count variation in the yarn — the primary cause of fabric defects in fine-count cambric.
Modern ring spinning machines in Indian spinning mills are increasingly computerised — automatic tension control, AI-assisted monitoring of yarn breaks, electronic clearing of thick and thin places. India’s mills in Gujarat, Tamil Nadu, Maharashtra, and Rajasthan have invested significantly in this modernisation, and the quality of 60s combed ring-spun yarn from top Indian spinning mills is now competitive with any equivalent globally.
The output of the ring frame is 60s yarn wound on small spinning bobbins — fine, even, slightly lustrous threads that will ultimately become the warp and weft of your cambric fabric.
Stage 7: Winding and Coning — Preparing Yarn for the Loom
The spinning bobbins are small — designed for the ring frame, not for the weaving loom. Before yarn can go to weaving, it needs to be wound from the small spinning bobbins onto larger, more practical packages — cones — in a continuous length without knots or breaks.
The auto-coning machine does this while simultaneously doing something equally important: quality clearing. Electronic yarn clearers on the auto-coner scan every centimetre of yarn as it winds, detecting and automatically cutting out thick places, thin places, and foreign fibre contamination (like dark cotton or synthetic fibre fragments). When the clearer detects a defect, it cuts the yarn, removes the defective section, and splices the clean ends back together — pneumatically, so the splice is nearly invisible and has similar strength to the original yarn.
This quality clearing step is particularly critical for 60s yarn going into 60×60 cambric. Thick-and-thin places in the yarn weave into the fabric as visible bands of irregular texture or density. Electronic clearing at the auto-coning stage catches these before they become woven-in fabric defects.
The output is 60s combed cotton yarn wound on cones — clean, even, defect-cleared, and ready for the preparation that precedes weaving.
Stage 8: Warping — Building the Loom’s Foundation
Weaving requires two sets of threads: warp (running lengthwise) and weft (running crosswise). Preparing the warp is called warping, and it is a more complex process than it might sound.
The warping machine takes yarn from hundreds of cones simultaneously and winds them side by side onto a large beam — called a warp beam — in the exact count, order, and length required for the weaving run. For 60×60 cambric at 92 ends per inch and 44-inch width, a warp beam contains approximately 4,000 warp threads, each wound to the exact length of the planned fabric run.
The quality of warping affects the weaving process directly. Uneven tension across the warp threads produces a fabric with tension bands — lines of slightly different density running lengthwise. This shows up in printed fabric as subtle striping in the dye absorption — visible mainly in solid-colour prints or very light tone-on-tone designs.
Stage 9: Sizing — Protecting the Warp for Weaving
Before the warp beam goes to the loom, the warp threads must be sized — coated with a protective starch or synthetic sizing agent that stiffens them slightly and protects individual fibres from the friction and abrasion of weaving.
During weaving, the warp threads open and close thousands of times per minute as the shed (the gap through which the weft passes) forms and closes. Without sizing, the fine 60s warp threads would suffer surface fibre breakage, creating hairy, damaged yarn that weakens and eventually breaks — causing loom stoppages, weaving defects, and reduced fabric quality.
The sizing machine passes the warp through a size bath of dissolved starch or PVA (polyvinyl alcohol), then through drying cylinders that dry and cure the size coating. The sized warp exits as a stiff, smooth, slightly glossy thread — ready for the rigours of the weaving shed.
The sizing agent must be completely removed during the fabric’s finishing process (desizing), because residual size in the finished fabric prevents dye penetration and affects hand feel. This removal — and how completely it is achieved — affects the final fabric quality more than most buyers realise.
Stage 10: Weaving — When Warp Meets Weft
The sized warp beam is mounted on the loom. The weft yarn — 60s combed cotton on pirn packages or shuttle-less pick packages — is prepared for insertion. The weaving begins.
For cambric 60×60, the weave structure is plain weave — the simplest and most balanced interlacing pattern in weaving. Each weft thread passes alternately over one warp thread, then under the next, then over the next, in a continuous alternating pattern. Each warp thread interlaces with every weft thread it crosses. The result is a symmetric, even, balanced structure with no dominant directionality — equally strong and equally textured in both the warp and weft direction.
Plain weave is deceptively demanding to execute well. Because every thread interlaces with every adjacent thread, any irregularity in thread tension, spacing, or yarn count is visible in the fabric. Weaving poplin or twill (which have longer interlacing floats) has more tolerance for slight irregularities. Plain weave has almost none.
Modern weaving machines used for fine-count cotton cambric are predominantly air-jet looms or rapier looms:
Air-jet looms insert the weft thread by propelling it across the shed using a controlled blast of compressed air. They are the fastest weaving machines available — capable of 600–1,000 picks per minute — and produce highly consistent weft insertion, important for even PPI (picks per inch) in fine fabrics.
Rapier looms carry the weft across the shed on a flexible metal or fibre-glass rapier (a rigid carrier system). They are slightly slower than air-jet looms but handle a wider range of yarn types and are well-suited for cambric production.
For 60×60 cambric at 92 EPI x 88 PPI, the loom must maintain precise reed spacing (the reed is the comb-like component that sets warp thread spacing) and consistent weft beat-up force. Inconsistent beat-up force produces fabric with uneven PPI density — visible as horizontal bands in the weave called “weft bars” or “weft streaks,” particularly noticeable in solid-dyed or lightly printed fabric.
The output of the loom is greige fabric — unbleached, un-finished, slightly stiff from the sizing agent, and carrying the natural cream-to-off-white colour of raw cotton fibre. If you picked up a roll of greige cambric 60×60 at this stage, you would not recognise it as the bright, smooth, slightly sheen fabric you know. That transformation happens in the next stages.
Stage 11: Desizing — Removing the Sizing Agent
The first wet process the greige fabric goes through is desizing — removing the starch or PVA sizing agent applied before weaving.
Enzymatic desizing is the most common and effective method for cotton fabrics. The fabric passes through a bath of amylase enzymes in warm water. The enzymes break down the starch molecular chains into water-soluble sugars, which are then washed away. PVA sizing can be removed by simple hot-water washing.
Incomplete desizing leaves residual size in the fabric, which blocks dye penetration, creates uneven absorption, and gives the finished fabric an unnatural stiffness. Well-desized cambric 60×60 should feel noticeably softer and more pliable after this stage than before it.
For buyers receiving printed fabric and noticing areas of uneven colour or unexpected stiffness in certain sections of a roll, incomplete desizing is one of the first process failures to investigate.
Stage 12: Scouring — Deep Cleaning the Cotton Fibre
Even after desizing, the cotton fibre contains natural waxes, oils, pectin, and other substances present in the raw cotton that were not removed during spinning. These substances must be removed before bleaching or dyeing — because they form a barrier that prevents water, dye, or bleach from reaching the cotton fibre.
Scouring treats the fabric with a hot alkaline solution — typically sodium hydroxide (caustic soda) and a surfactant — in a steam-heated vessel called a kier, or in continuous range scouring machines for larger production volumes. The alkaline solution saponifies (breaks down) the natural waxes and oils, dissolving them into the wash water. The surfactant helps wet the fibre uniformly and remove the dissolved impurities.
After scouring, the fabric is a good, absorbent cotton grey — capable of absorbing water uniformly and ready for bleaching. Absorbency at this stage is tested by timing how quickly a drop of water soaks into the fabric. Quality scoured cotton cambric should absorb a water drop in under five seconds. Fabric that takes longer has residual hydrophobic substances still present, indicating incomplete scouring.
Stage 13: Bleaching — Creating the White Canvas
This is the stage that transforms the natural cream-off-white of scoured cotton into the bright, clean white that makes Sanganeri block-print fabric so visually compelling.
Cotton’s natural colour comes from pigments present in the fibre — primarily flavonoids and other plant-derived colour compounds. Bleaching oxidises and destroys these pigments, leaving the fibre colourless and bright.
Hydrogen peroxide bleaching is the standard method for cotton cambric. The fabric passes through a hydrogen peroxide bath with sodium silicate (as a stabiliser to control the peroxide’s decomposition rate) and caustic soda (to maintain alkaline conditions for effective bleaching). The bath is heated to 90–100°C and the fabric dwells in the bleach for a controlled time period.
The degree of bleaching is measured as whiteness index — using a spectrophotometer that measures how much light the fabric reflects across the visible spectrum. For block-print cambric, a high whiteness index (typically 80–90 on the Hunter whiteness scale) is important because the brightness of the white ground affects how vividly printed colours read against it. Under-bleached fabric has a yellowish cast that makes printed colours look duller and less vibrant.
After bleaching, the fabric is thoroughly washed to remove all bleaching chemicals — residual peroxide or alkali will damage fibres over time and affect subsequent dyeing or printing.
Stage 14: Calendering — The Finishing Touch That Defines Cambric
This is the final and defining step of cambric cotton 60×60 production — the process that gives cambric its characteristic name and character.
The calendering machine consists of a stack of large, heavy rollers — alternating between hard steel rollers and soft elastic rollers — through which the fabric passes under controlled pressure and heat. The heavy rollers press the fabric at forces of several tonnes per linear metre, while heat from the steel rollers raises the temperature of the fibre surface.
This combination of heat and pressure does several things simultaneously:
The fabric’s surface becomes compressed and smoothed — individual fibre ends on the yarn surface are pressed flat, eliminating the micro-fuzziness that bleached but uncalendered cotton has. The yarns at the fabric surface deform slightly under pressure, spreading out and filling the inter-yarn spaces. The result is a surface that is smooth to the touch, slightly more opaque (because the yarn spreading reduces the open spaces between threads), and reflects light uniformly — producing cambric’s characteristic subtle sheen.
The weave structure is also stabilised by calendering — threads are locked more firmly in their interlaced position, giving the fabric better dimensional stability and a crisper hand than uncalendered fabric.
The pressure and heat of calendering is calibrated to the fabric specification. Too little pressure and the surface remains slightly rough and matte — the fabric may look more like an ordinary bleached cotton than true cambric. Too much pressure and the fabric feels stiff and flat, losing the soft crispness that makes cambric pleasant to wear. The ideal calendered cambric has that characteristic feel: smooth, slightly cool to the touch, with a quiet firmness that irons beautifully and holds its shape.
After calendering, the fabric is wound into rolls, quality-checked, and prepared for dispatch — either as greige (after weaving only), bleached-white (most common for Sanganer block printing), or piece-dyed (if a coloured ground is required before printing).
The Complete Process at a Glance
| Stage | Process | What It Does |
|---|---|---|
| 1 | Ginning & Bale Opening | Separates fibre from seeds, cleans and loosens bale |
| 2 | Carding | Aligns fibres, removes short fibres and impurities |
| 3 | Combing | Removes short fibres, achieves near-perfect alignment |
| 4 | Drawing | Evens out sliver thickness, improves fibre parallelism |
| 5 | Roving | Attenuates sliver, adds holding twist |
| 6 | Ring Spinning | Drafts roving to final count, inserts permanent twist |
| 7 | Winding & Coning | Clears defects, winds onto loom-ready packages |
| 8 | Warping | Arranges warp threads on beam in correct order and count |
| 9 | Sizing | Coats warp threads to protect from weaving friction |
| 10 | Weaving | Interlaces warp and weft in plain weave at 92×88 |
| 11 | Desizing | Removes sizing agent for clean, absorbent fabric |
| 12 | Scouring | Removes natural waxes and oils for full absorbency |
| 13 | Bleaching | Creates bright white ground, destroys natural pigments |
| 14 | Calendering | Smooths surface, adds subtle sheen, sets cambric character |
Why Knowing This Makes You a Better Buyer
Understanding the manufacturing journey from cotton bale to finished cambric 60×60 gives fabric buyers and fashion brands a practical advantage that no amount of supplier reassurance can replace.
When you know that combed yarn produces better fabric than carded yarn, you can ask your supplier the right question and evaluate the answer. When you know that calendering defines cambric’s surface character, you can recognise uncalendered fabric being sold as cambric. When you know that incomplete desizing affects dye absorption, you know what to test in your sample before approving bulk production.
The fourteen stages described in this article are not theoretical — they are the actual production steps that happen in spinning mills across Gujarat and Tamil Nadu and weaving units across Rajasthan and UP before a roll of 60×60 cambric arrives at a fabric market in Sanganer. Each stage is a quality control point. Each stage is where a manufacturer investing in quality does things differently from one cutting corners.
At Shri Radhey Fabrics, the cambric cotton 60×60 we supply comes with complete specification documentation — combed yarn confirmation, GSM certificate, whiteness index, thread count verification. Because we know what each of those numbers means in production terms, and we know that our brand clients are building products whose quality depends on every stage of this journey being done correctly.
Shri Radhey Fabrics is a fabric manufacturer and wholesale supplier based in Sanganer, Jaipur — the heart of India’s block-print textile tradition. We supply cambric cotton 60×60 in bleached, greige, dyed, and printed form to fashion brands, garment manufacturers, and fabric wholesalers across India, the UK, UAE, USA, and beyond. Low MOQ available for new brands. Visit shriradheyfabrics.com or DM us on Instagram @shriradheyfabrics for samples and enquiries.